

Onboarding is the process of introducing your app to new users and guiding them through its features and benefits. This is a very important feature when you have a bunch of cool features in your app. It’s a way of helping your users get more familiar with the app and encouraging them to use it regularly.
A common method to implement onboarding is to use a series of pages with some text and images that explain the main functionality of your app. To make the experience more engaging and interactive, you can also add a page indicator that shows the current page and the number of pages in the onboarding sequence. In this blog post, we will show you how to create a simple and elegant onboarding page indicator in Flutter in just 3 minutes.
Let’s see the final output first.
Pretty cool! Right? So let’s get started.
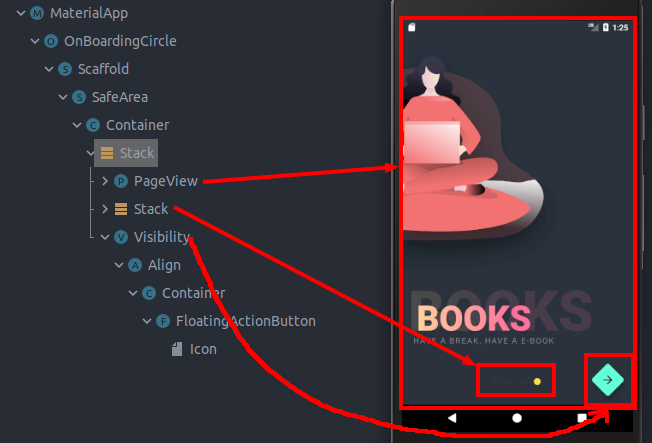
Stack(
  alignment: AlignmentDirectional.bottomCenter,
  children: <Widget>[
    PageView.builder(...),
    Stack(...),
    Visibility(...)
  ],
)
The Stack Widget is the best fit when we need to overlap one widget over other. So in our case, Stack has:
Now let’s see each widget in detail.
Creates horizontal/vertical slidable widget.
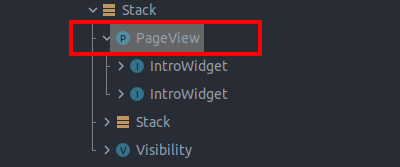
First of all, we will need to create a list of widgets. This list may contain different screens that will show up when sliding. It can be created like this
final List<Widget> introWidgetsList = <Widget>[
  Screen1(...),
  Screen2(...),
  Screen3(...),
];
We can also create one common widget/screen and change the images based on passed params. This is optional but good to have.
PageView.builder(
  physics: ClampingScrollPhysics(),
  itemCount: introWidgetsList.length,
  onPageChanged: (int page) {
    getChangedPageAndMoveBar(page);
  },
  controller: controller,
  itemBuilder: (context, index) {
    return introWidgetsList[index];
  },
)
Now we can provide the list details to itemCount and itemBuilder property of PageView.builder. onPageChanged property is used to notify when pages change so that we can show the appropriate page indicator.
I have used stack but you can use any widget to show page indicators.
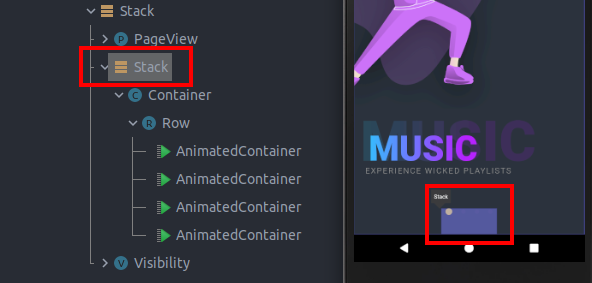
Stack(
  alignment: AlignmentDirectional.topStart,
  children: <Widget>[
    Container(
      margin: EdgeInsets.only(bottom: 35),
      child: Row(
        mainAxisSize: MainAxisSize.min,
        mainAxisAlignment: MainAxisAlignment.center,
        children: <Widget>[
          for (int i = 0; i < introWidgetsList.length; i++)
            if (i == currentPageValue) ...[circleBar(true)] else
              circleBar(false),
        ],
      ),
    ),
  ],
)
Stack further contains the Row() that aligns the page indicators besides each other and circleBar(true/false) is the actual widget that shows Page indicator or Dot. Using Dart’s 2.3 new feature Collection for and Collection If we can show a number of circleBar() as the number of screens and pass True or False to notify whether isActive.
Let’s have a deeper look inside it.
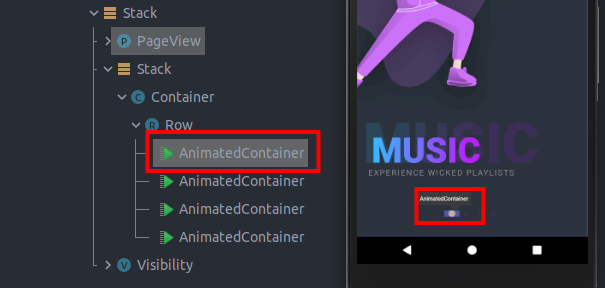
Widget circleBar(bool isActive) {
  return AnimatedContainer(
    duration: Duration(milliseconds: 150),
    margin: EdgeInsets.symmetric(horizontal: 8),
    height: isActive ? 12 : 8,
    width: isActive ? 12 : 8,
    decoration: BoxDecoration(
        color: isActive ? kOrange : klightGrey,
        borderRadius: BorderRadius.all(Radius.circular(12))),
  );
}
As you can see it’s just AnimatedContainer that changes its height and width and color based on the isActive parameter.
This widget controls the visibility of its child, and in our case its Floating action button.
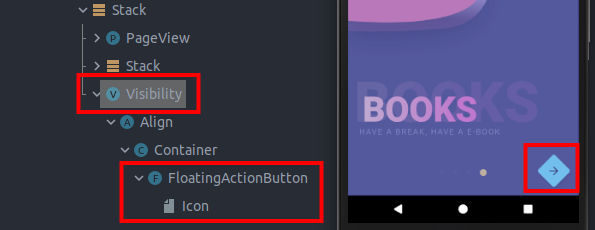
Visibility(
  visible: currentPageValue == introWidgetsList.length - 1
      ? true
      : false,
  child: FloatingActionButton(
    onPressed: () {
    },
    shape: BeveledRectangleBorder(
        borderRadius: BorderRadius.all(Radius.circular(26))),
    child: Icon(Icons.arrow_forward),
  ),
)
FloatingActionButton gets visible only when the last screen is showing up.
Finally here comes the magic.
Here is the implementation for the getChangedPageAndMoveBar that we are calling from onPageChange of PageView.
void getChangedPageAndMoveBar(int page) {
  currentPageValue = page;
  setState(() {});
}
Setting currentPageValue as of currently displayed screen on PageView and setState(() {}); will do rest of the magic. I would suggest you please try it from here.
We hope this blog post has helped you learn how to create an onboarding page indicator quickly and easily. If you want to learn more about our Flutter development services or need help with your projects, feel free to contact us at Aubergine Solutions. We are a team of skilled and passionate developers who can help you build beautiful and responsive apps.
If you enjoyed this post, don’t miss our other amazing blogs:
How to Build a Superhero Interaction App in Flutter with Awesome Animations
How to Create a Text Reader Animation in Flutter in Easy Steps