

Apple has announced ARKit in iOS 11 (beta).
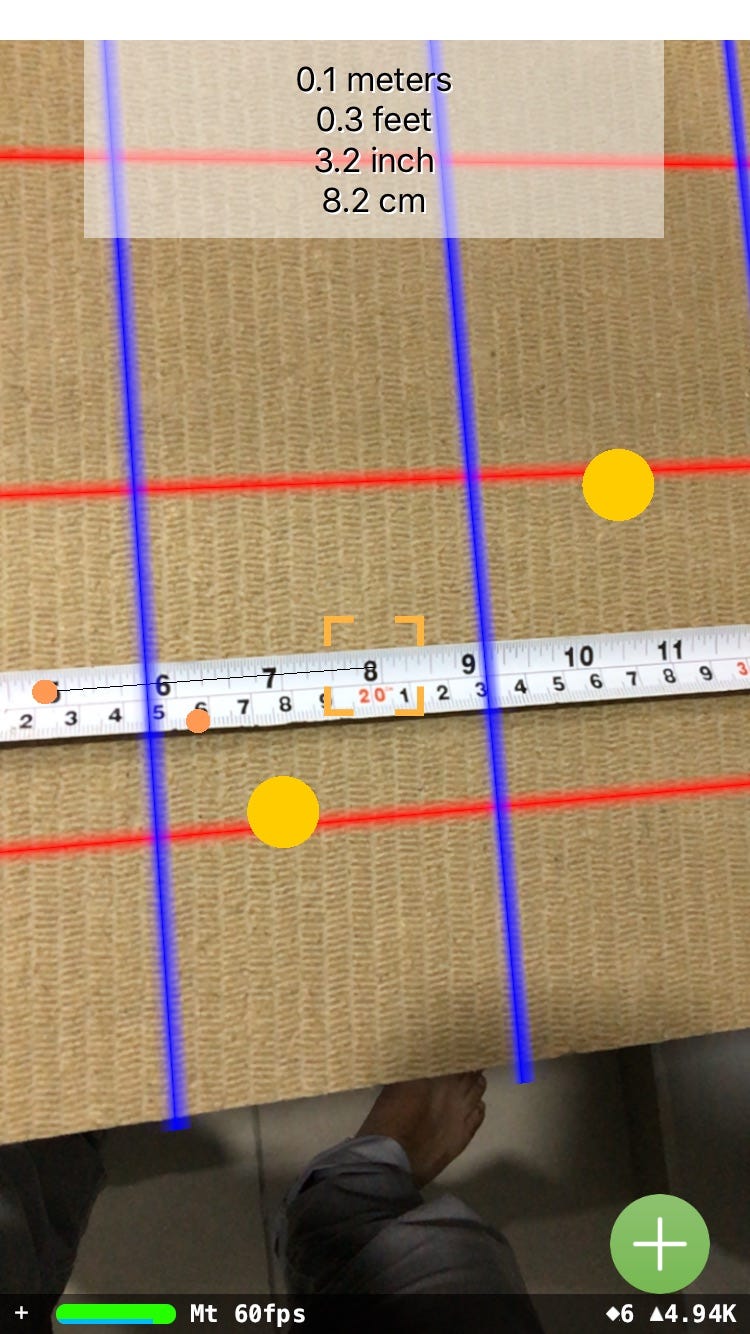
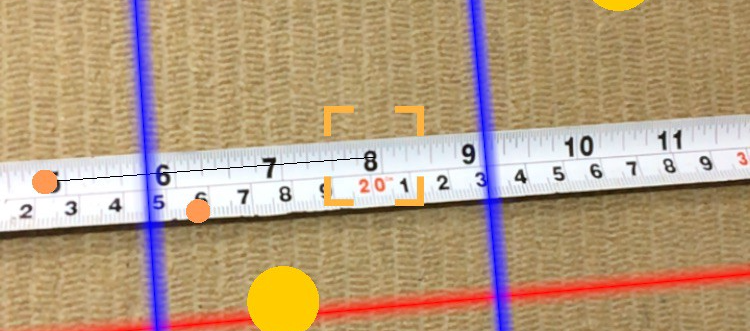
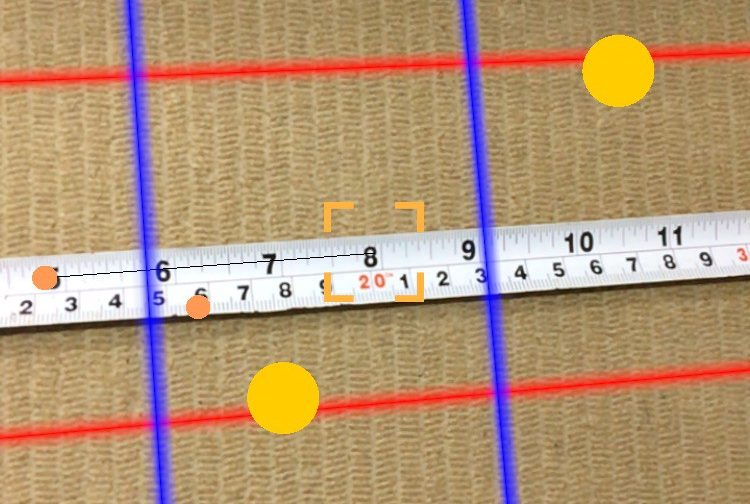
Have a look, how we can measure using ARKit.
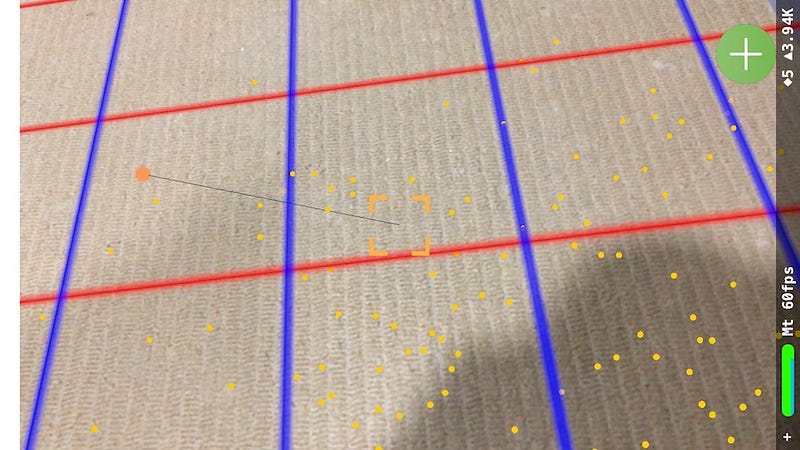
In this article, we will build a measuring app that would measure the length or width of objects.
Contents
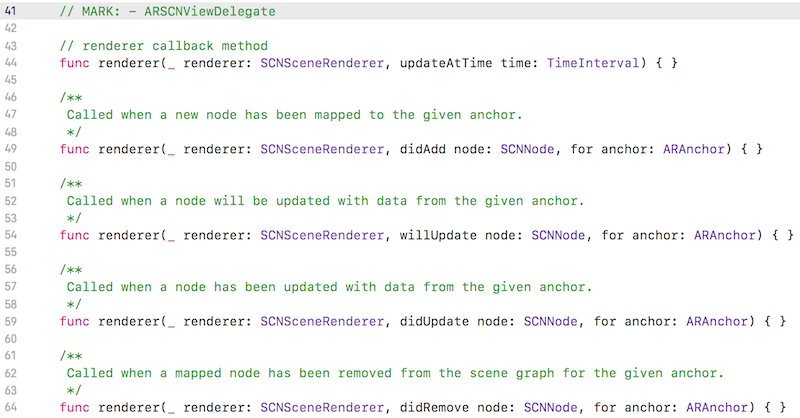
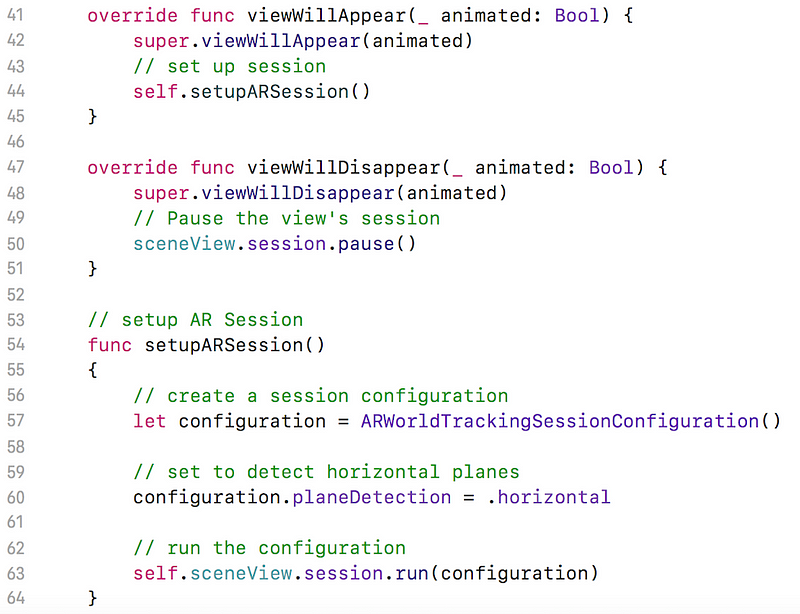
We’ll see how ARKit will be useful to create an app that can be used in measurement. We’ll go through the demo project.
We’ll go through steps:
1. Identify prerequisites
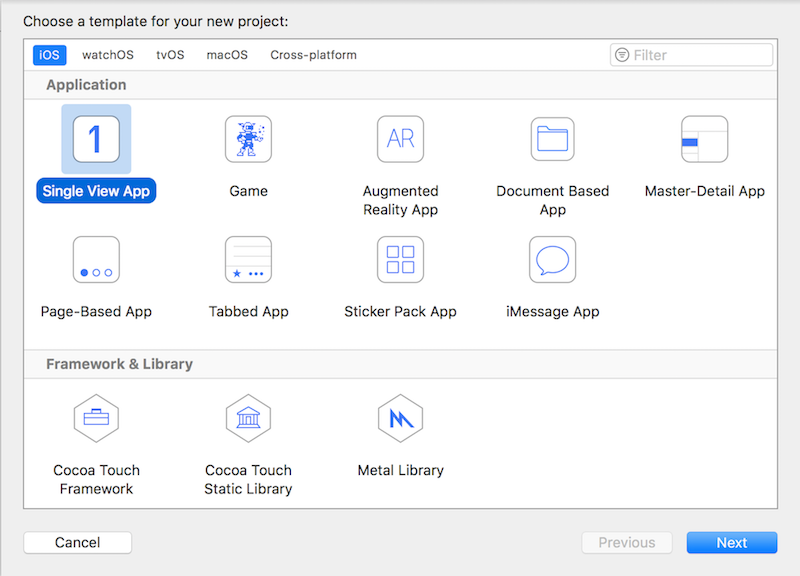
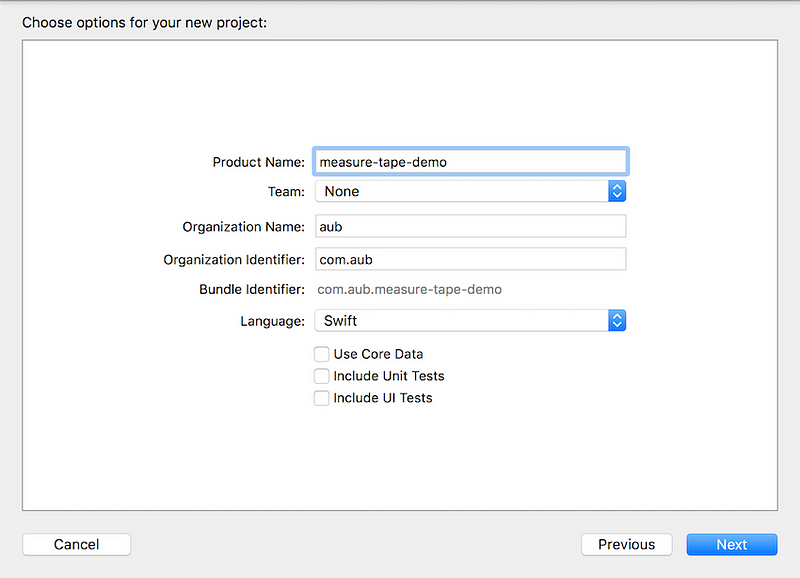
2. Create project in XCode
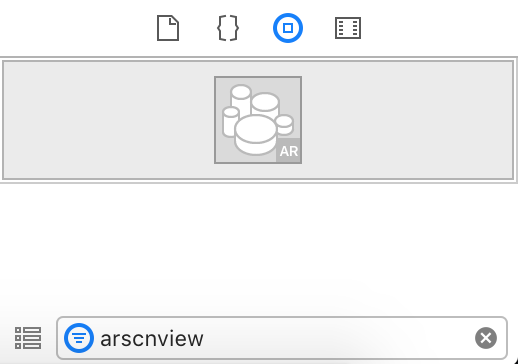
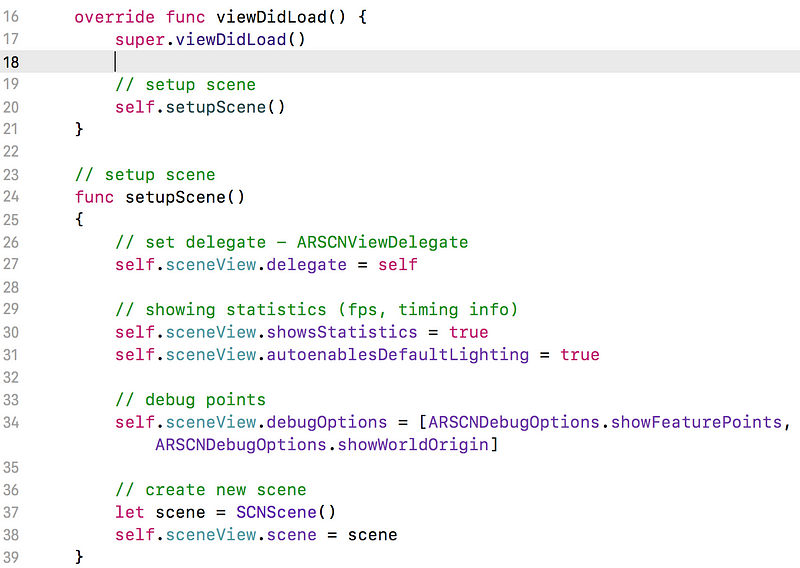
3. Setup basic things
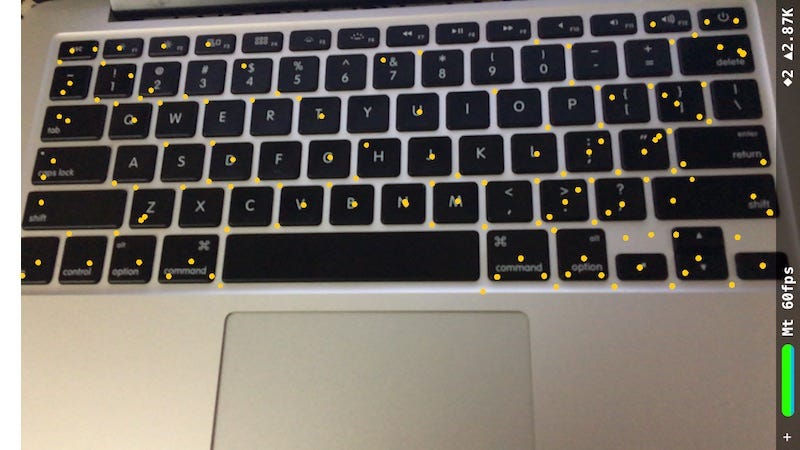
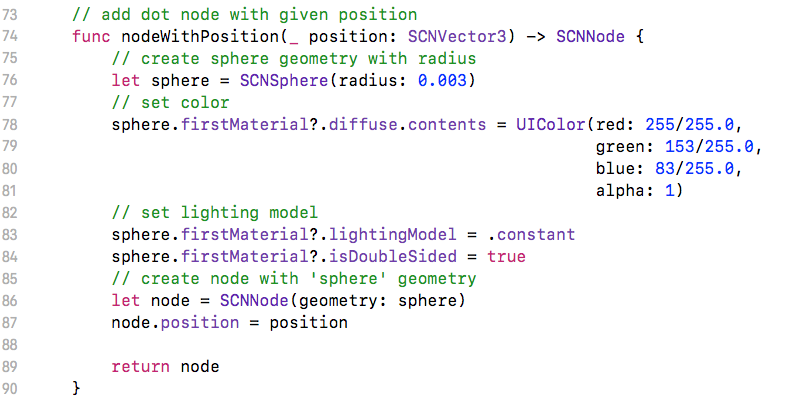
4. Setup focus object
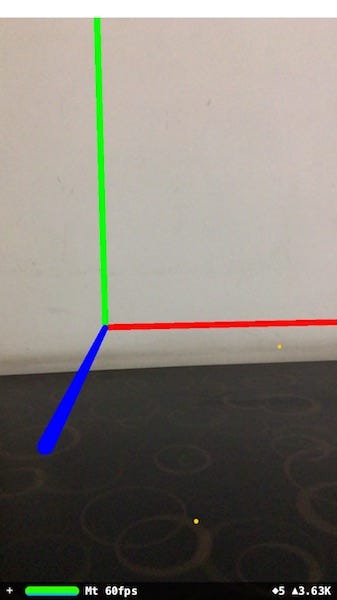
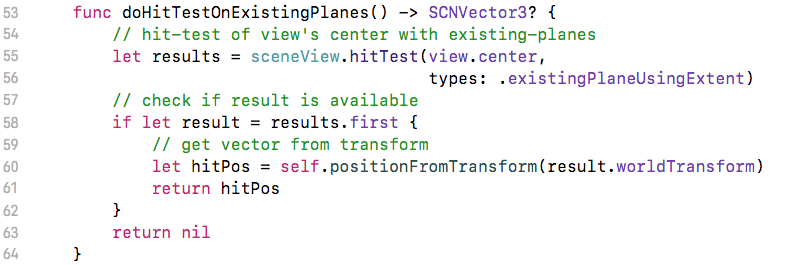
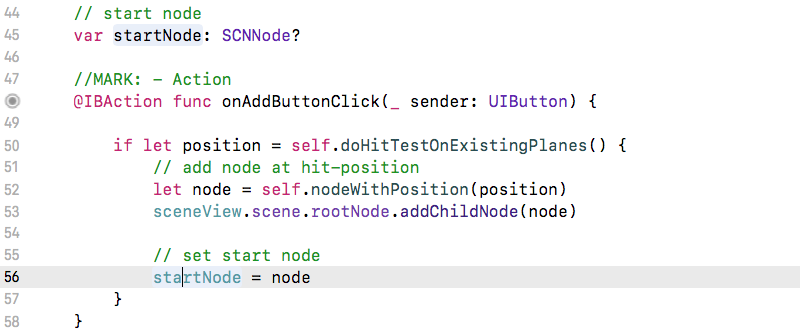
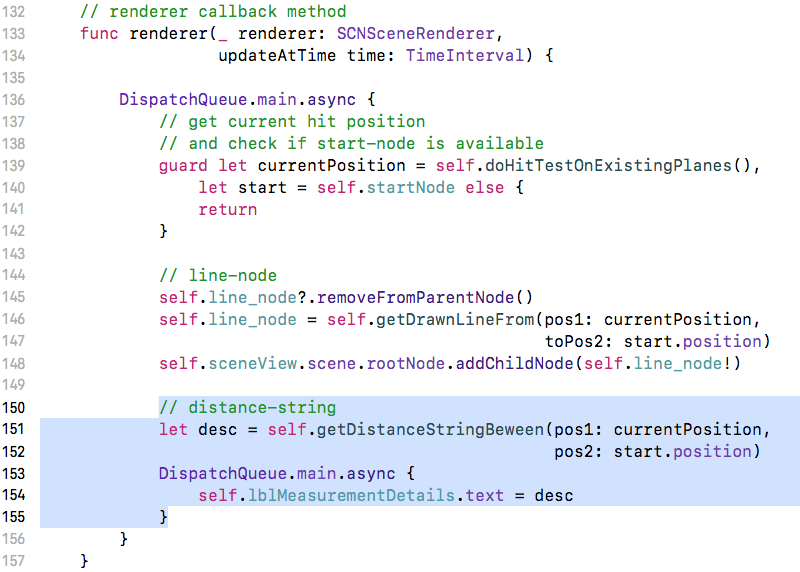
5. Put object using hitTest
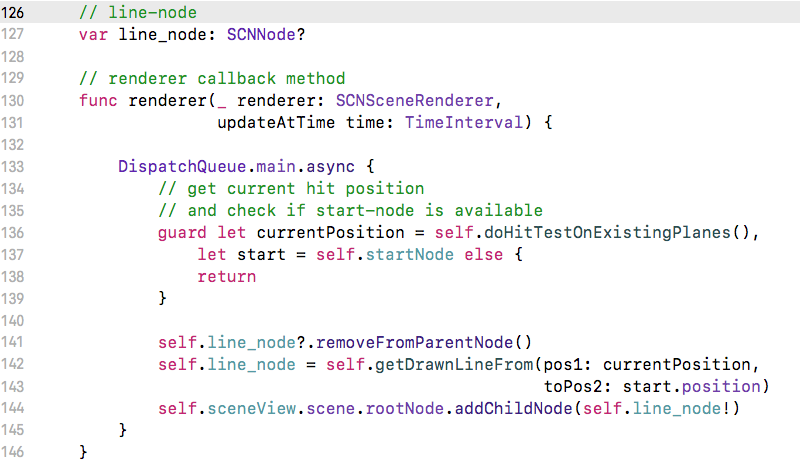
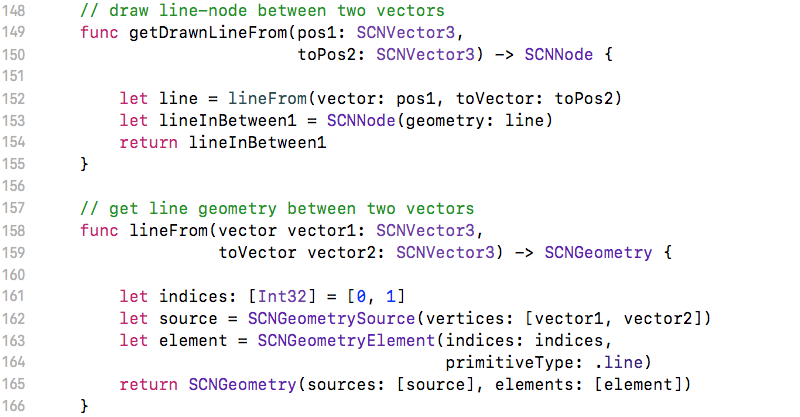
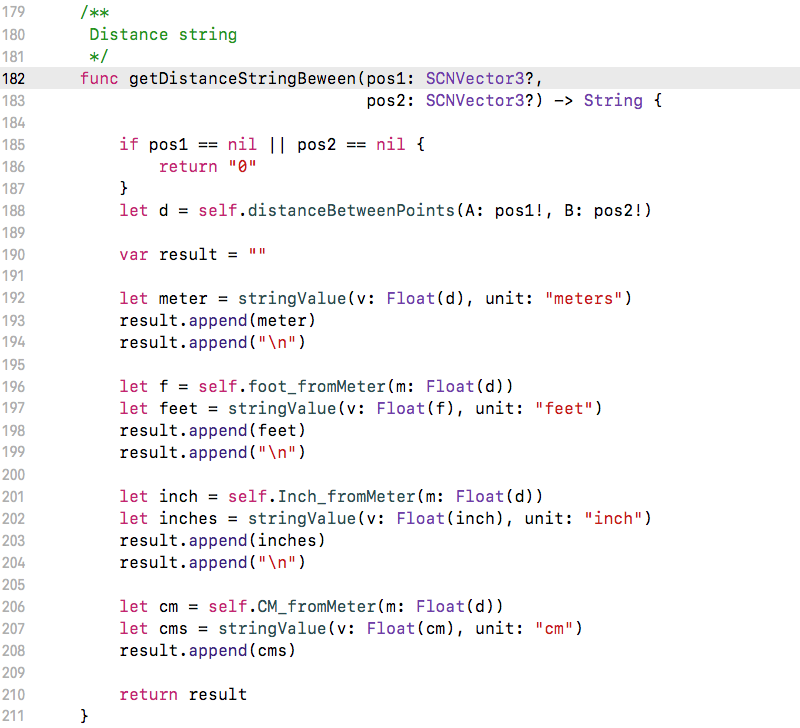
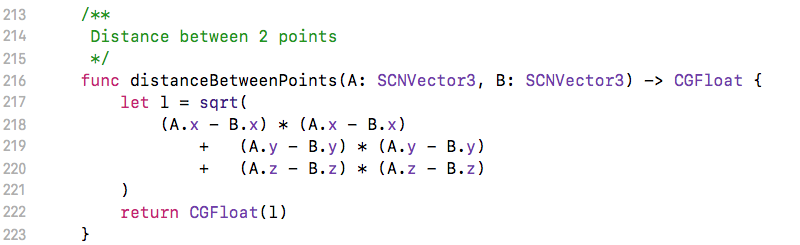
6. Measure