

It is possible that sometimes the designer may give you to develop UI component that is not already developed/coded before and force you to think on how to proceed for developing it. You can consider it as a challenge for yourself. Fortunately, Flutter helps you a lot in overcoming such a challenge.
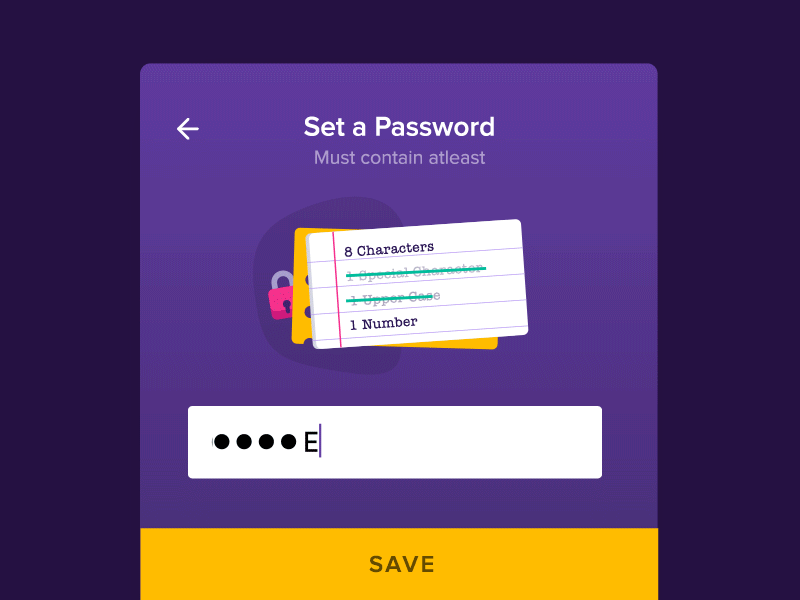
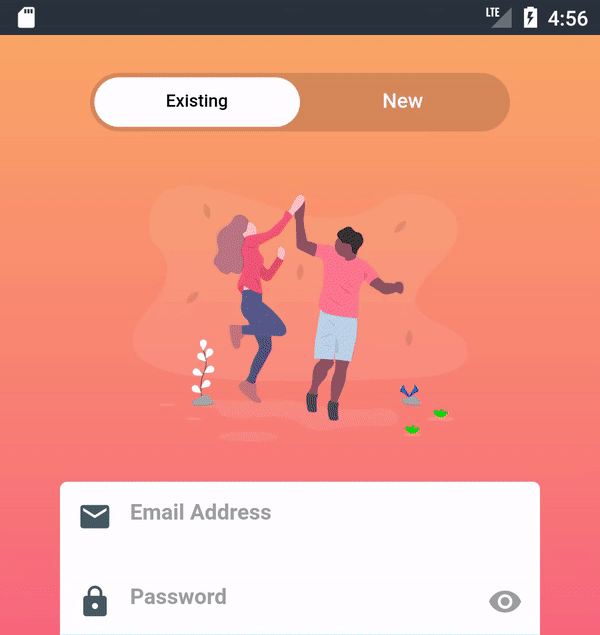
For example, consider you are given a task to develop this kind of UI
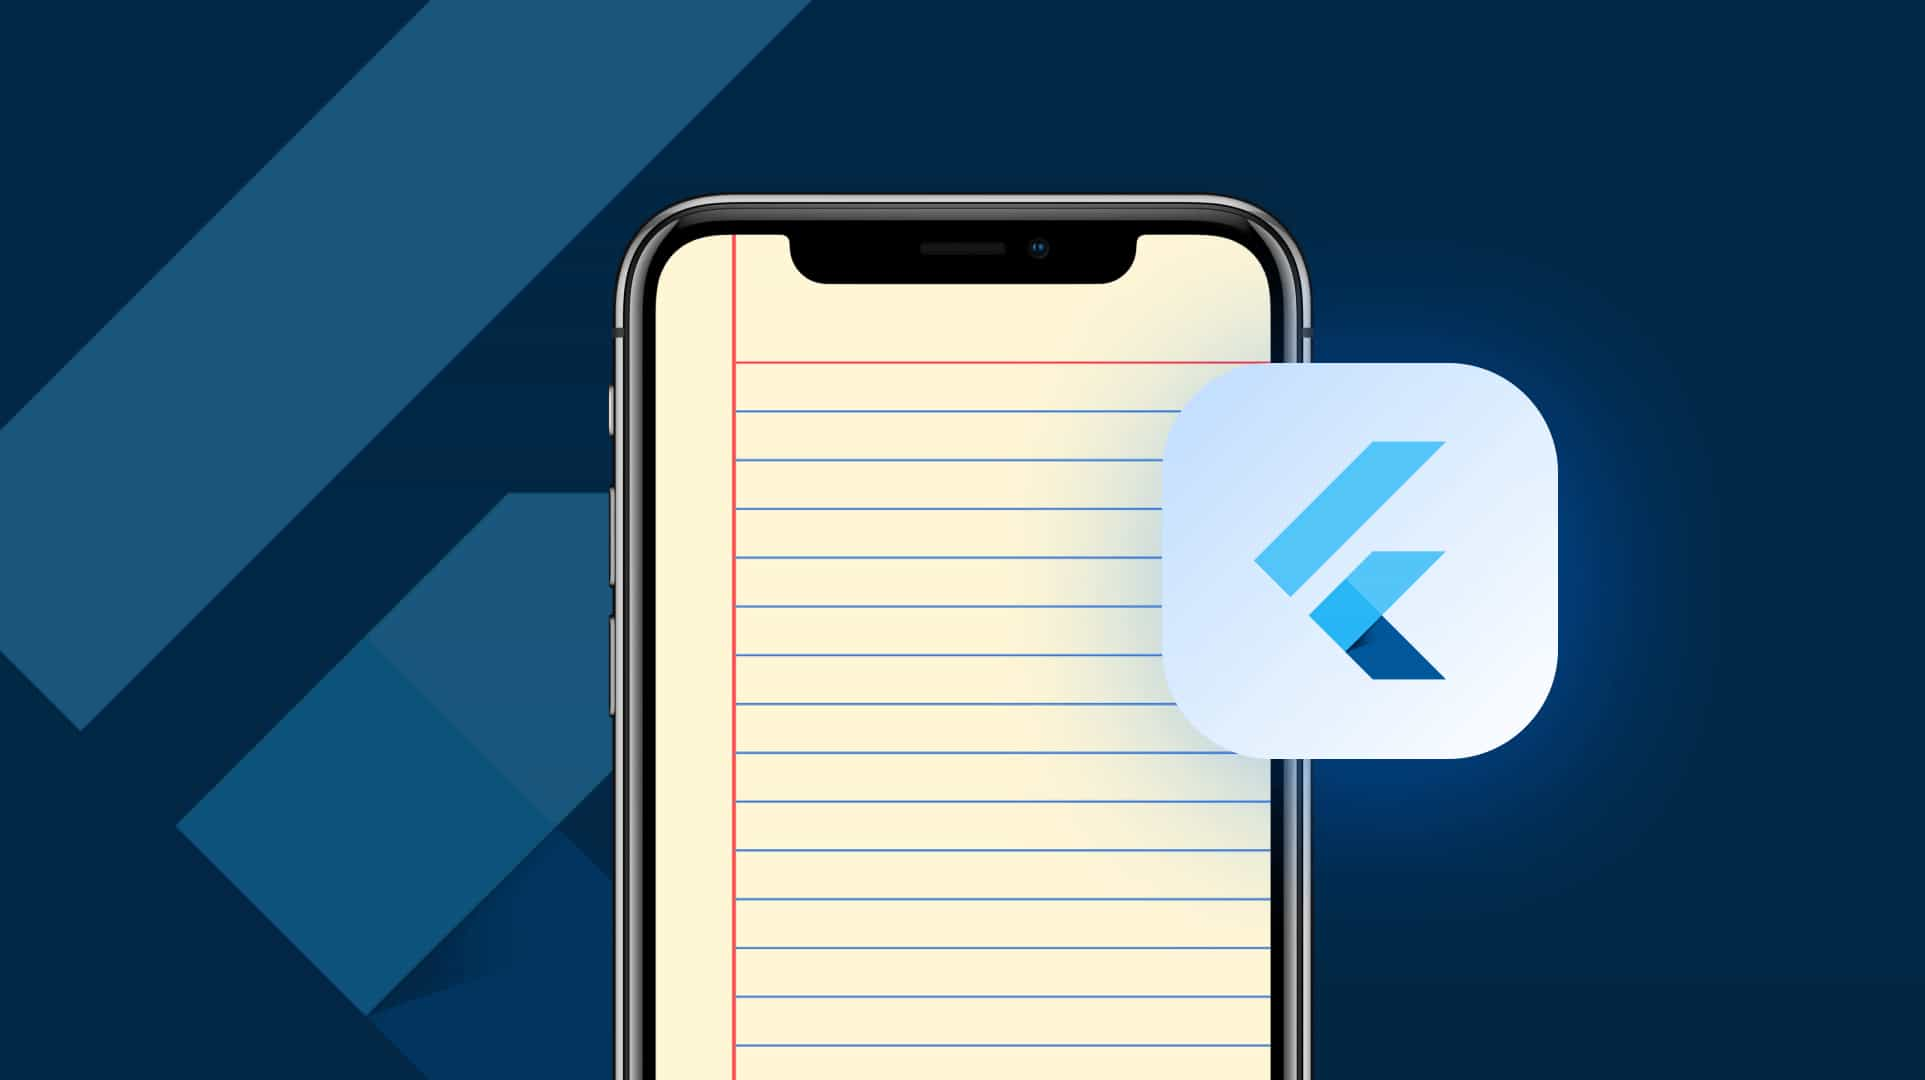
As we can see that most of the UI can be developed with the available Widgets in Flutter. But how about the ‘NotebookPageWidget’ over which the checklist is displayed for password validation criteria. Although we can develop ‘NotebookPageWidget’ using Flutter widgets by composition(Mix of Widgets). But let’s be a little bolder and try to create ‘NotebookPageWidget’ using CustomPainter.
So our goal in this tutorial is to develop this

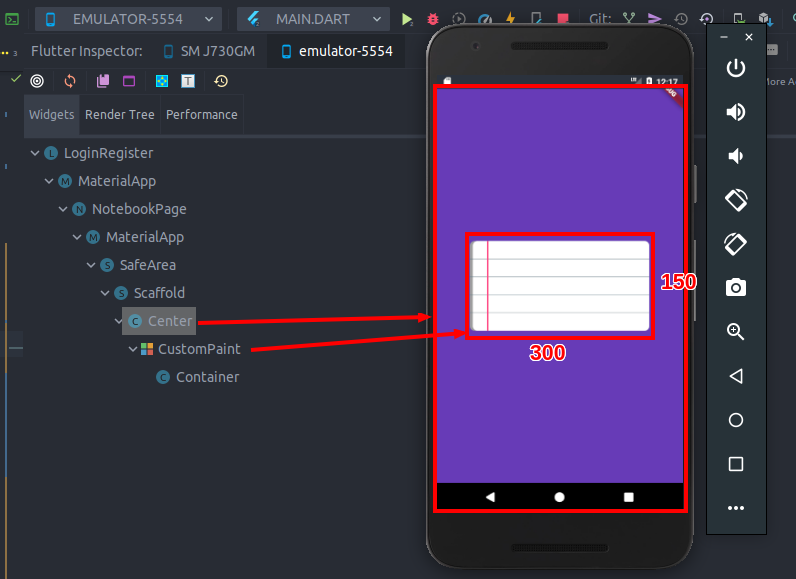
We can see that inside the center widget we have our own ‘NotebookPageWidget’ which is built using CustomPaint()
In layman language, I can say that It is used to draw anything on the screen.
CustomPaint(
  foregroundPainter: PagePainter(),
  child: Container(
    width: 300,
    height: 150,
  ),
)
Properties:
In our case, we want our PagePainter() to appear on top of given child container so we will just use foregroundPainter.
Yes, it’s not readymade widget because that is the widget in which we will write drawing instructions.
import 'package:flutter/material.dart';

class PagePainter extends CustomPainter {
  @override
  void paint(Canvas canvas, Size size) {

  }

  @override
  bool shouldRepaint(PagePainter oldDelegate) {
//TODO Implement shouldRepaint
  }

  @override
  bool shouldRebuildSemantics(PagePainter oldDelegate) {
//TODO Implement shouldRebuildSemantics
  }
}
paint(Canvas canvas, Size size): Is the method where actual painting instructions are written.
shouldRepaint(PagePainter oldDelegate): Decides to redraw or not.
Now let’s create our custom UI step by step
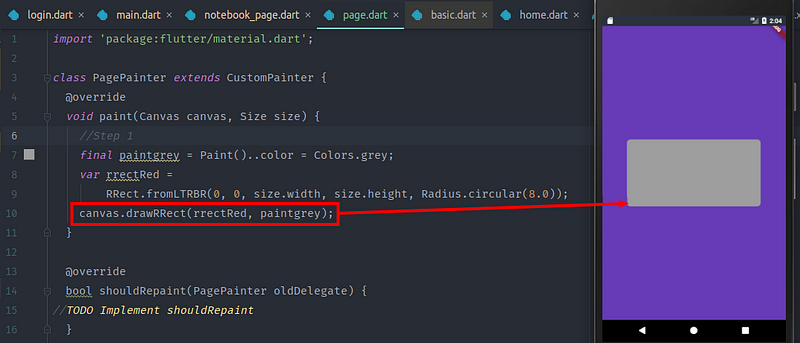
void paint(Canvas canvas, Size size) {
 //Setp 1
 final paintgrey = Paint()..color = Colors.grey;
  var rrectRed =
      RRect.fromLTRBR(0, 0, size.width, size.height, Radius.circular(8.0));
  canvas.drawRRect(rrectRed, paintgrey);

}
Paint()..color = Colors.grey creates paint object with grey color.
RRect.fromLTRBR(0, 0, size.width, size.height, Radius.circular(8.0)) creates rectangle starting from top left to bottom of right with radius of 8.0 around it.
canvas.drawRRect(rrectRed, paintgrey) draws rectangle with grey color.
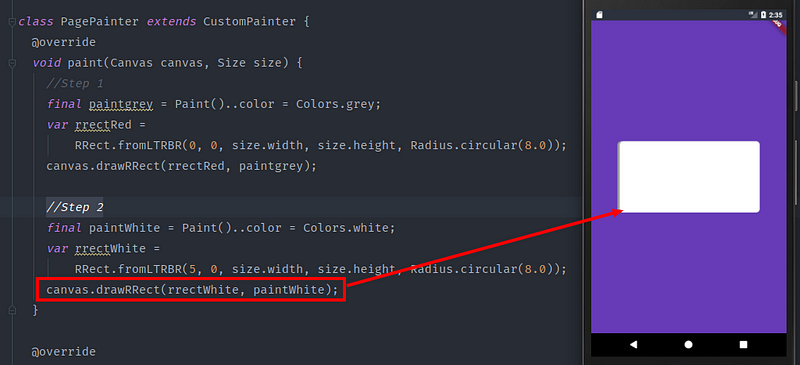
//Step 2
final paintWhite = Paint()..color = Colors.white;
var rrectWhite =
    RRect.fromLTRBR(5, 0, size.width, size.height, Radius.circular(8.0));
canvas.drawRRect(rrectWhite, paintWhite);
RRect.fromLTRBR(5, 0, size.width, size.height, Radius.circular(8.0)) creates white rectangle leaving margin of 5 from left side.
NOTE: Writing drawing instructions sequentially will draw on top of the previous one. Just how to use pencil and color for drawing on paper. Feels more natural.
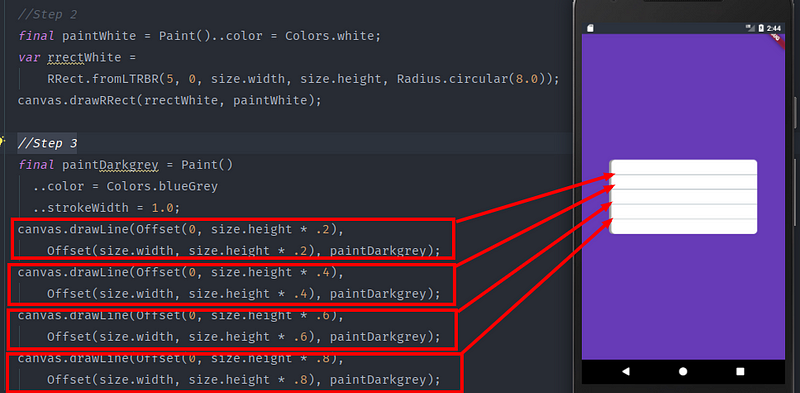
//Step 3
final paintDarkgrey = Paint()
  ..color = Colors.blueGrey
  ..strokeWidth = 1.0;
canvas.drawLine(Offset(0, size.height * .2),
    Offset(size.width, size.height * .2), paintDarkgrey);
canvas.drawLine(Offset(0, size.height * .4),
    Offset(size.width, size.height * .4), paintDarkgrey);
canvas.drawLine(Offset(0, size.height * .6),
    Offset(size.width, size.height * .6), paintDarkgrey);
canvas.drawLine(Offset(0, size.height * .8),
    Offset(size.width, size.height * .8), paintDarkgrey);
canvas.drawLine(Offset(0, size.height * .2), Offset(size.width, size.height * .2), paintDarkgrey) draws line from Offset(0, size.height * .2) i.e 20% of height from left side to Offset(size.width, size.height * .2) i.e 20% of height to right side. and similarly other lines are drawn in order of increase in height that acts as place where our text should align.
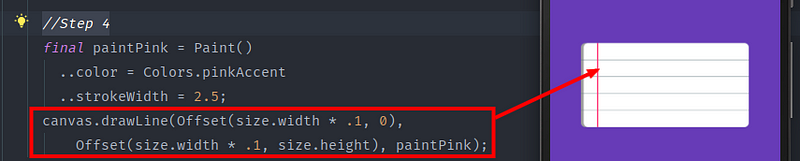
//Step 4
final paintPink = Paint()
  ..color = Colors.pinkAccent
  ..strokeWidth = 2.5;
canvas.drawLine(Offset(size.width * .1, 0),
    Offset(size.width * .1, size.height), paintPink);
New paint object is created to have pink accent color and stroke width of 2.5 which is used to draw a vertical line from Offset(size.width * .1, 0) i.e 10% of width and very top to Offset(size.width * .1, size.height) i.e 10% of width to very bottom which acts as a margin from where text writing should begin.
Your own made custom widget is ready to be used by you and others in Flutter community. I hope you have understood the basic idea of implementing this.
And I have already created the task that was used as an example for this article. It’s called Password Guide. Please do check out here and improve my code. I would like to learn from you.
Also read our other blogs: